If your site shows a map, we need a Google Maps key to make it work. We will ask you to enable the Google Maps API and generate a Google Maps API Key for us.
To create a billable account with Google for using their Maps API on both live and staging websites, follow these steps and use the associated links for detailed guidance:
Create a Google Account: If you don't have one, create a Google account.
Sign Up for Google Cloud Platform: Visit the Google Cloud Platform homepage and sign up. Set up your billing account and payment method as detailed in the Google Cloud billing documentation.
Create a New Project: Use the Google Cloud Console to create a new project for managing the Maps API and other resources.
Enable the Maps API: Enable the Maps JavaScript API (or other relevant Maps APIs) for your project by navigating to “APIs & Services > Library” in the Google Cloud Console. You can find instructions in the Google Maps Platform documentation.
4a. In our example, we will use the Google Cloud Platform project My website project with the billing account already attached to it.
4b. Enabling the set of APIs
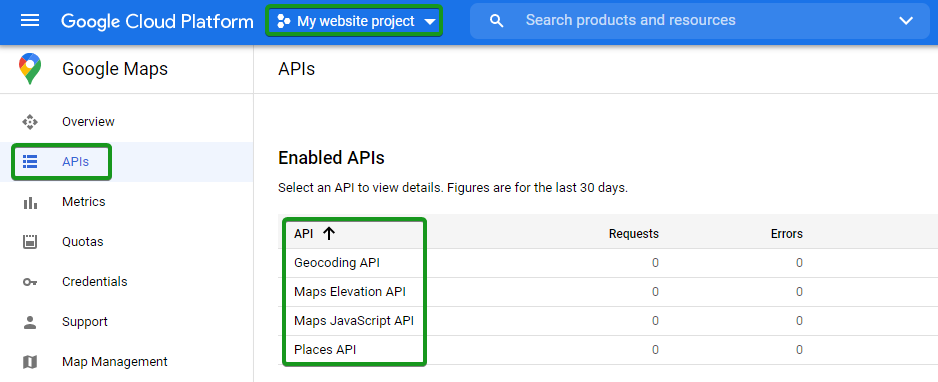
4c. Before generating the key itself, we will make sure that the required set of APIs is enabled for the My Website project. The following APIs should be enabled in the case of the Maps module of the Website Builder:
4d. After enabling the required set of APIs for the project, the list of Google Maps APIs will look similar to this:
Generate API Keys: Create API keys via “APIs & Services > Credentials” in the console. For detailed instructions, refer to the Google API key documentation.
5a. Once the required set of APIs is enabled, you’re ready to generate the key. To get an API key:
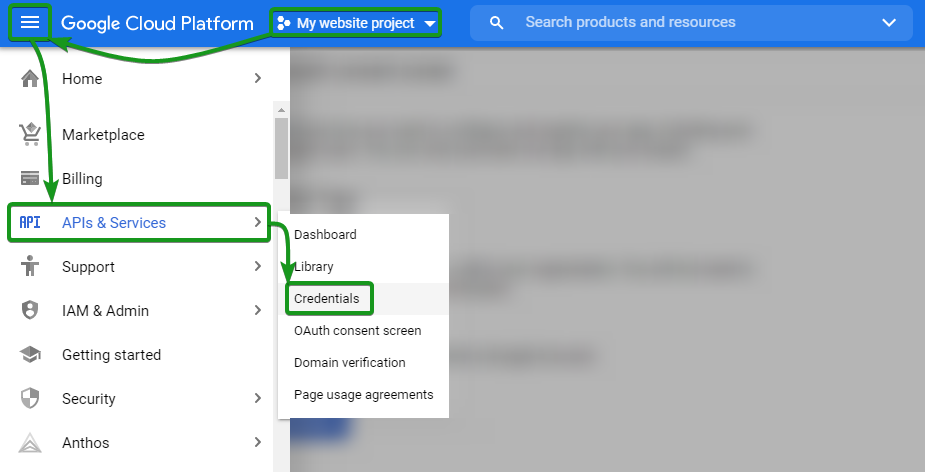
1. Make sure that the correct project is selected (in our case, My website project).
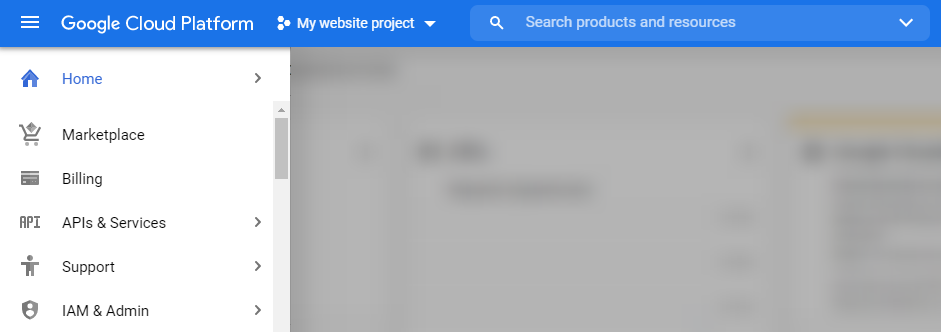
2. Proceed to APIs & Services >> the Credentials menu:
5b. Click on + Create credentials >> the API key button:

5c. The API key created window will display your newly-created API key:
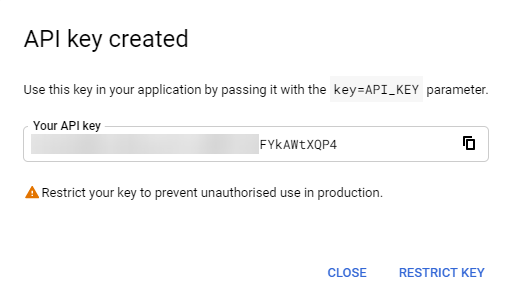
5d. At this point, the API key is ready to be used within the application. In our example, it is Website Builder and its “Maps” feature. We recommend additionally restricting the use of the API key to a particular web project to prevent unauthorized use and quota theft.
Send us the API key securely. We will connect it to your site.
Restrict the API Key: Apply restrictions to your API key for security, specifying allowed websites and APIs. Refer to the API key restrictions guide.
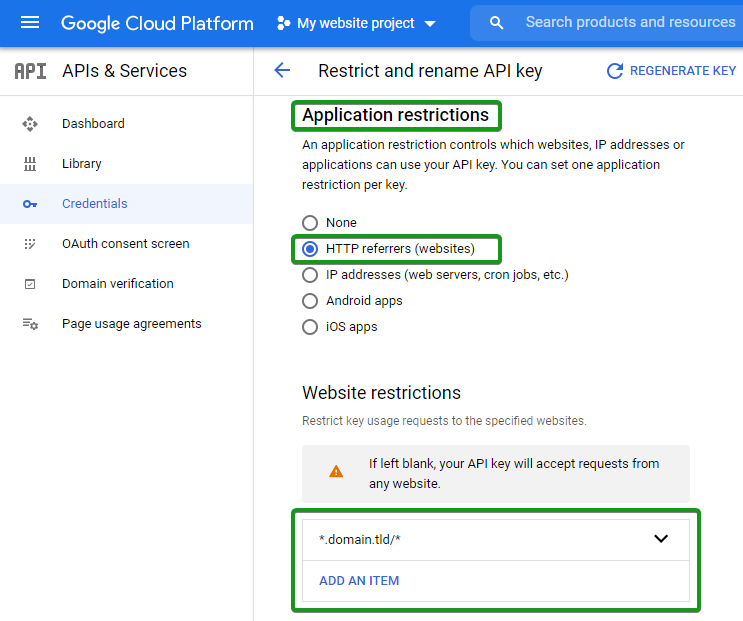
6a. This feature provides additional security and makes sure that only authorized requests are made with your API key. There are two restrictions:
1) Application restriction
2) API restriction. We recommend enabling both of them.
1. Proceed to the Edit menu within the API key list:

2. Navigate to the Application Restrictions section. Since HTTP referrers match the expected website setup, we suggest proceeding with it and using the template .domain.tld/. The latter will allow any subdomain or path URLs in a single domain name to be eligible for API key usage.
NOTE: Make sure to change the domain.tld to the domain name of your website:
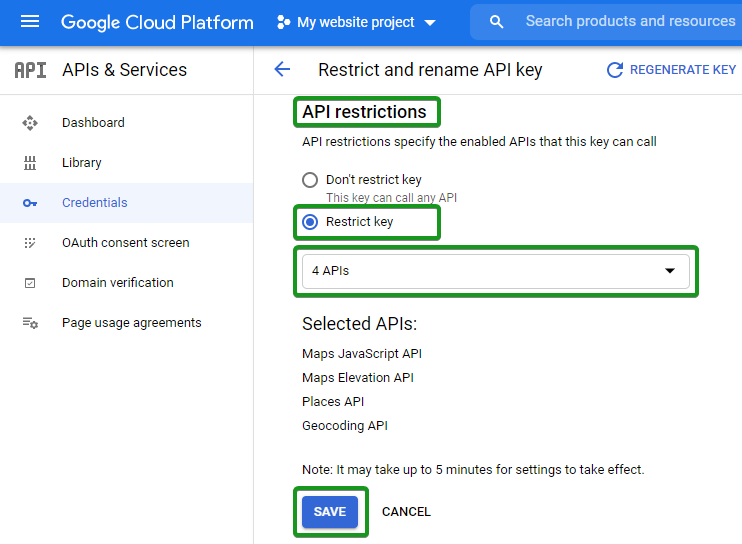
3. The API restrictions section is available on the same page. Restrict the key to the set of APIs selected earlier and click Save to apply the changes:
Set Up Billing Alerts: To manage your costs, set up billing alerts in the Google Cloud Console under the billing section. Instructions can be found in the Google Cloud billing alerts documentation.
Test and Monitor: Regularly monitor your API usage in the Google Cloud Console to avoid unexpected charges and ensure everything is functioning correctly.
These steps and resources will guide you through setting up and managing a billable Google Maps API account for your websites.
If you still have questions or concerns, please create a support ticket or contact us, and we will guide you through the process.